Google Analytics provides many valuable insights into how visitors to your website interact with your content and actions such as Contact Us or lead generation forms.
Table of Contents
ToggleStep 1 -Create an Account
Go to https://marketingplatform.google.com/about/analytics/ and click “Get started today”.
Sign in to your Google account.
If you don’t already have a Google account for your business, see our article How to Create a Google Account with your Existing Email Address.
You will then be presented with a multi-part form to create your Google Analytics account.
Enter an Account name of your choosing, usually the business name.

Step 2 – Create a Property
A property is what you want to monitor the traffic of, typically a website or an app.
If you just have a website, then “Website”, “Primary Website”, or “{Business Name} Website” would be appropriate. Clarity is helpful, especially if you ever add additional properties in the future.
Set your timezone and currency values as appropriate.

Step 3 – Business Details and Objectives
The next two screens will ask about business details (industry and company size) and then objectives. We recommend selecting the Objectives shown below, though these are not critical settings. Don’t over think it.

You can then Create the property and accept the Terms and Conditions of the service if agreeable.
Step 3 – Data Collection
In order for this tool to function, it needs to receive data from your website.
Select “Web” platform type.

In the Data Stream screen, enter your website’s URL (just the domain / home page). You can use the same name for the Stream as you did the property “{Business Name} Website”, or similar.
You can leave the “Enhanced measurement” section to it’s defaults – we’ll set up all the detailed configurations for you as appropriate later.

You will then see your newly created Property, which of course has not yet received data, so let’s get integrated with your website.

The Google Tag menu shows a few options for integration. Our recommendation is to select “Install manually” and copy the code (icon at the top right) and send that to your web developer (continued below).

Go ahead and click on your new Property, and also send your web developer the Measurement ID as shown below.

This should give your web developer everything they need to connect your website to Google Analytics, and begin processing data.
Depending on your website platform and setup, they may recommend using Google Tag Manager, which can make it easier to set up a variety of analytics tools and custom configurations later on. We recommend this approach as well, since it allows us to customize your conversion tracking etc without having to go through your web developer as much.
Step 4 – Share Access
You will likely want to share access with another staff member of your company for redundant access, as well as your marketing team or agency you are working with.
Hover over the left column and click “Admin” at the very bottom.

Then at the top under Account Settings, click “Account access management”.

At the top far right, click the white plus icon in a blue circle:

Then enter the email address you wish to share access with. Use “Administrator” or “Editor” for fellow staff.
“Editor” is often appropriate for outside agencies.

You should be all set once the developer integrates the tracking code in your website, great job!
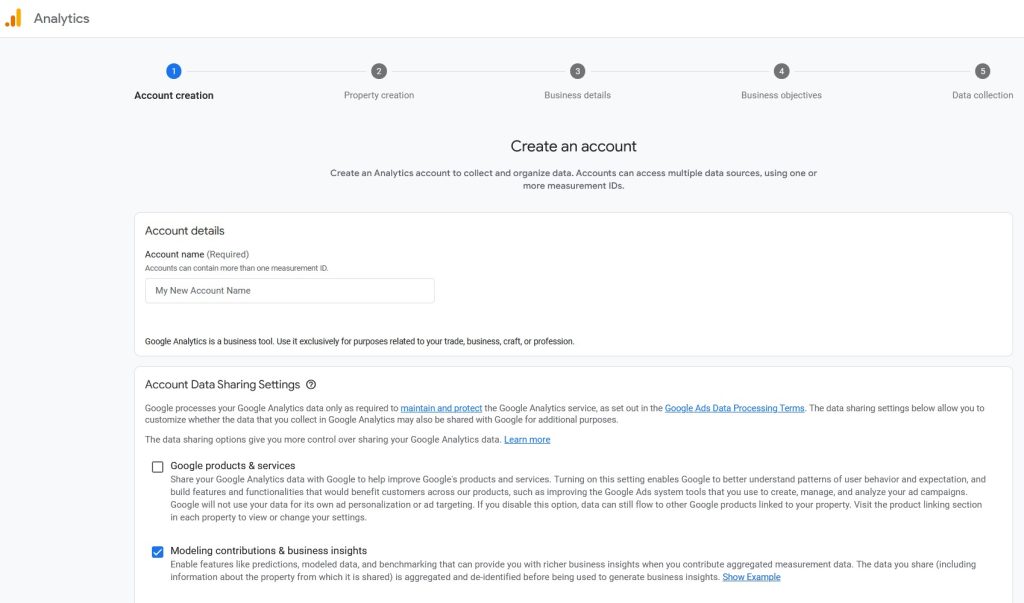
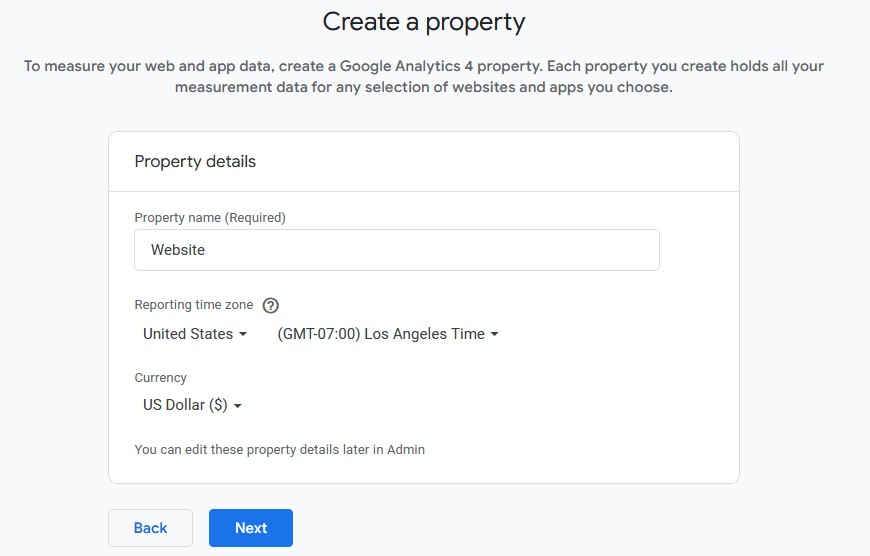
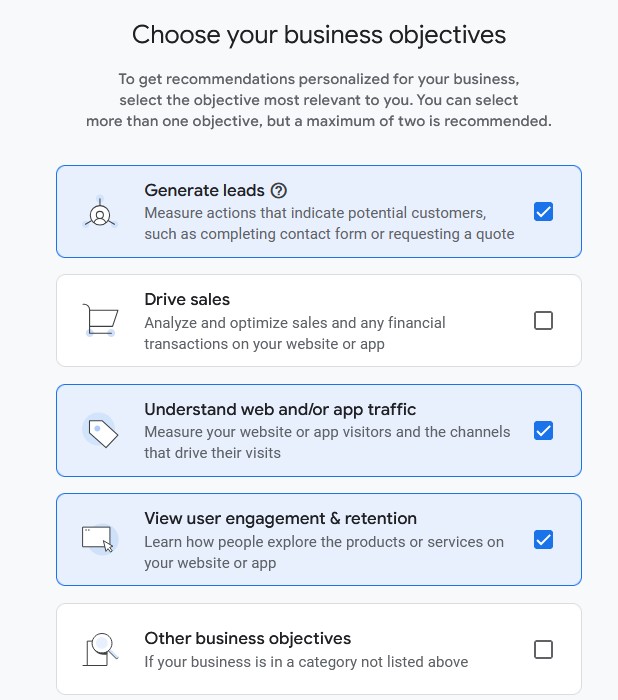
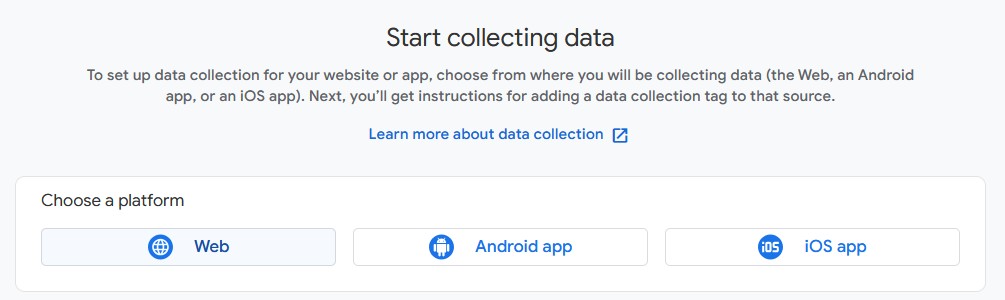
- How to Create a Google Analytics Account - August 1, 2025
- How to Create a Google Search Console Account - August 1, 2025
- How to Create a Google Account with your Existing Email Address - August 1, 2025